It’s a Reader Request day. I received a comment through the Soldrevet website question forms about the abstracted images that I use. I’m using today’s post to show you a few steps along the creation route, starting from digital photo and ending at a usable image.
Do you have a question or a request for me to write about? Let me know using the comment form below, and I’ll put your suggestion in my queue.
Overview (details below)
I use Adobe Illustrator for nearly all of my graphical productions. The technique I’m writing about today is called Image Trace. Read through the instructions in the link; I recommend that you use the presets to start exploring. I walk though the whole process using my current header image for Graphic Design as a tutorial example.
- “Place” (Shift+Ctrl+P) your image on the artboard
- “Rasterize” your image
- Use “Image Trace” to get a look you want
- “Expand” to get access to modifications
- Remove or change as you wish
Choose an image and begin
Many of my images choose themselves. The image that fronts Soldrevet was an easy choice for leading my brand. The image for the Professional Coaching page came second, as an intentional follow up. The image I’m talking about today for Graphic Design I found hiding on my computer somewhere. All photos were taken by Marie at Outspoken Images.
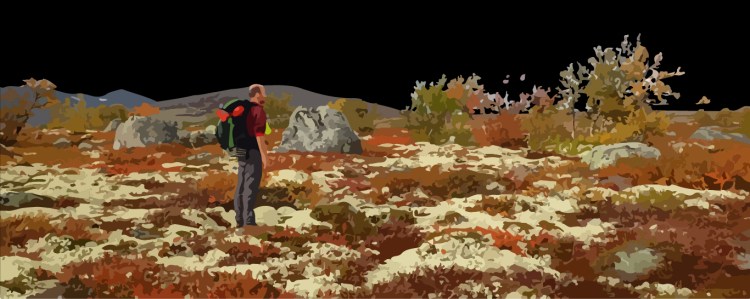

I’m not worried too much about the composition of the shots right now. Marie and I are out on adventures several times a week, so I will update these header photos as I settle on a look for the website. The more complex items in the image, the more work I’ll have in Illustrator to get the product I want. We start by placing the image into our Illustrator document and getting it prepared to apply Image Trace.
Illustrator instructions
- Open a fresh file and place your image on the artboard
- You may wish to crop the image, which helps speed up Image Trace processing
- With the image selected, choose “Rasterize” from the “Object” menu
- I usually choose “Screen (72 ppi)” from the resolution drop-down menu because I’m about to drop the resolution even more using Image Trace. Higher resolution doesn’t help me much and makes the Image Trace Operation slower
First explorations with Image Trace
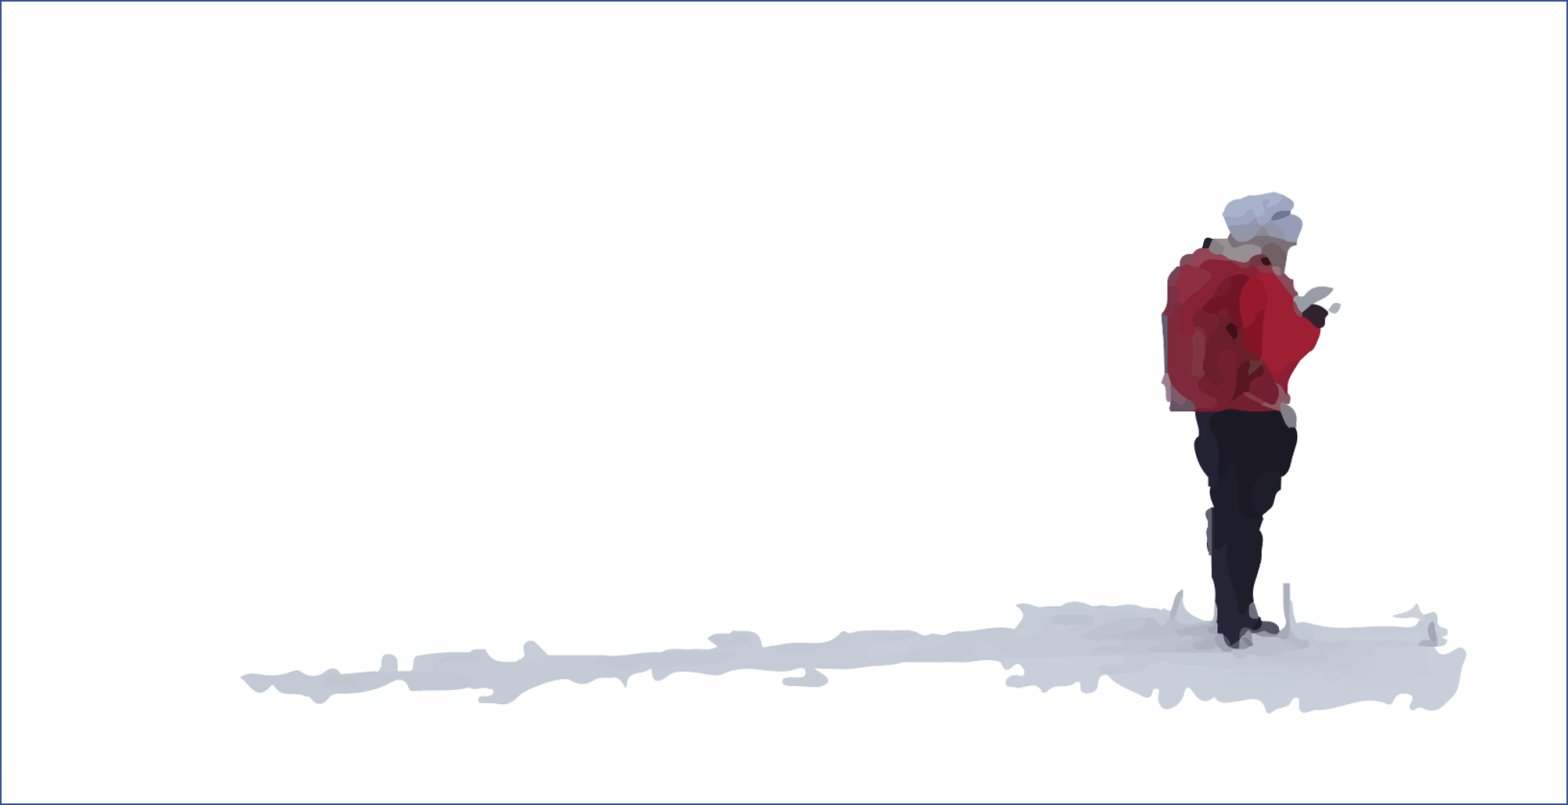
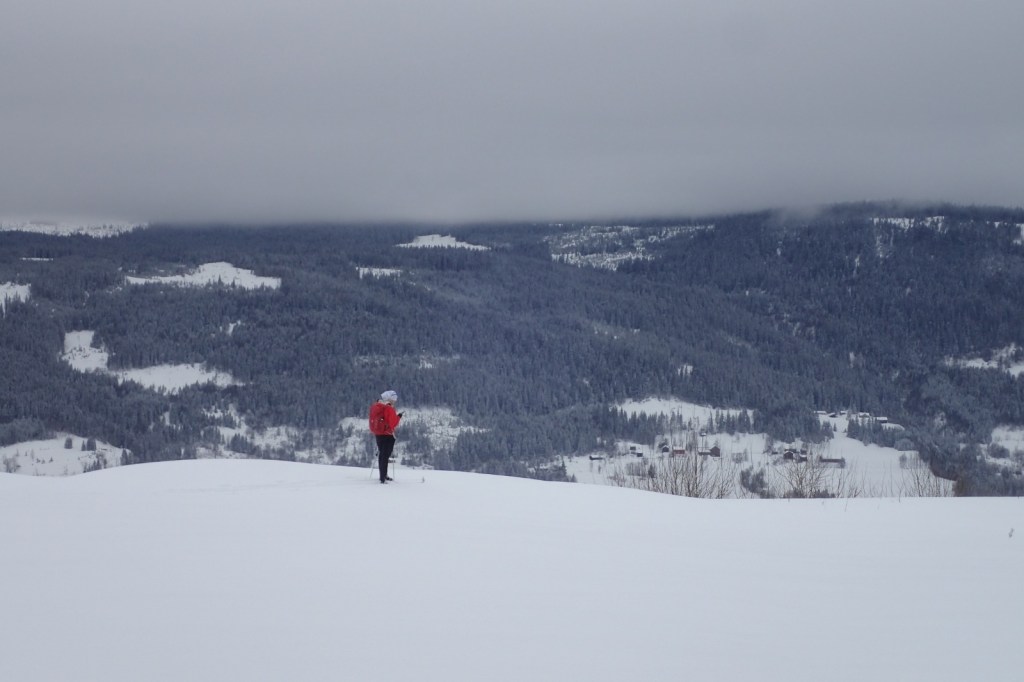
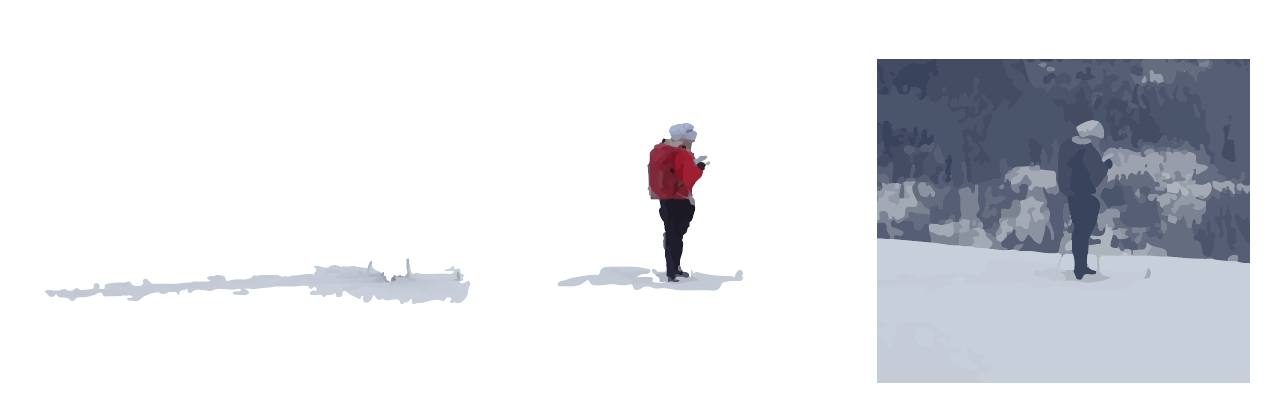
Here’s where I begin playing around. I don’t typically come into these projects with a vision of the final product. For this image of me on skis, I discovered that I couldn’t get the background of trees to be simple enough, the fog and snow to look right, and for me to appear. I decided to go for a solution with layers. The full image will be the most blurry, and I will be highlighted. To get the highlighting to work, I’d need to remove parts of the background – that’ll come in later steps.
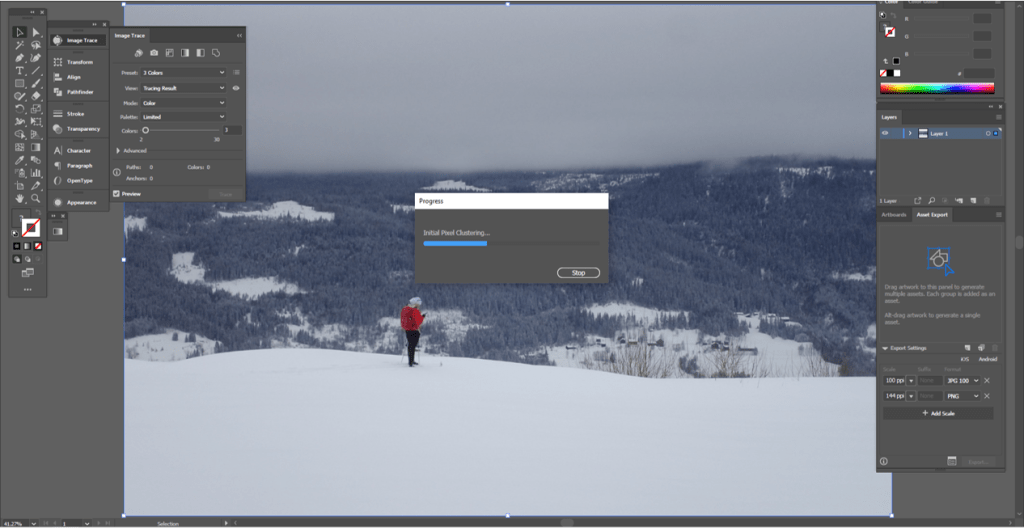
Processing the Image Trace 
Results of Image Trace using preset “6 Colors” 
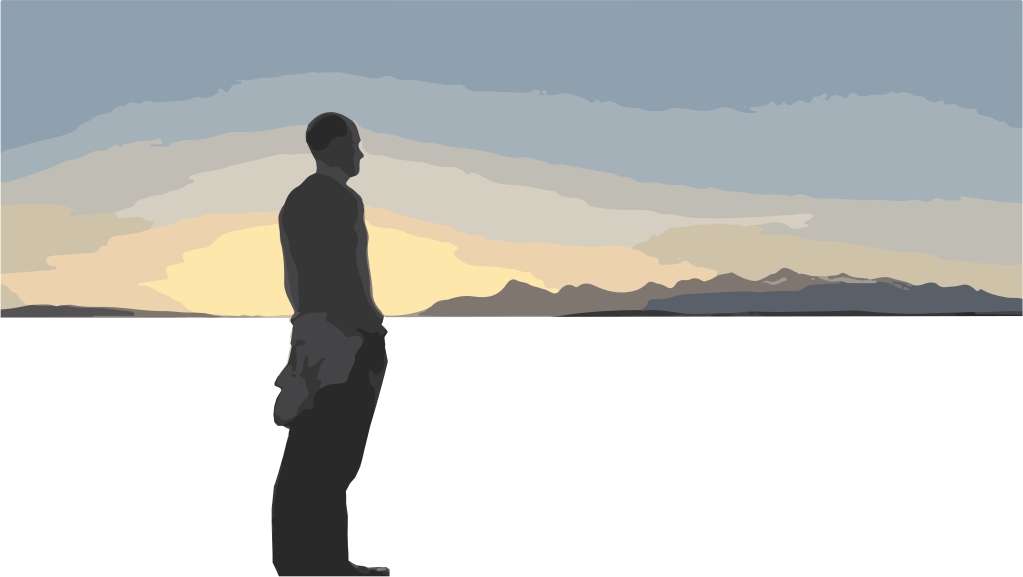
Final background image
Illustrator instructions
- Use “Image Trace” to start playing around. Find it under Window > Image Trace
- If making many minor changes using the advanced settings, try un-checking the “Preview” box so that Illustrator doesn’t make updates with every adjustment
Expand and modify
I like playing with the Image Trace result by hand. I think I was attracted to the style of Illustrator because it uses vectors to define images rather than pixels. How my brain works well with vector graphics is a theme unto itself, and we can take that up another day. To address today’s needs, I’ll limit my comments to say that we’re going to modify the big color blocks that result from applying Image Trace.
The background image is complete from the previous section, so no changes to make. What I want is to make an Image Trace result that shows more color and definition of my profile. So I import the original photo again, crop the image to show me and just a bit around me, and play with Image Trace again. For highlights, I start with the “High Fidelity Photo” and then adjust the sliders to make the result look as I wish. I wanted a fuzzier look, so all I’ve done here is decrease the number of colors from the default.
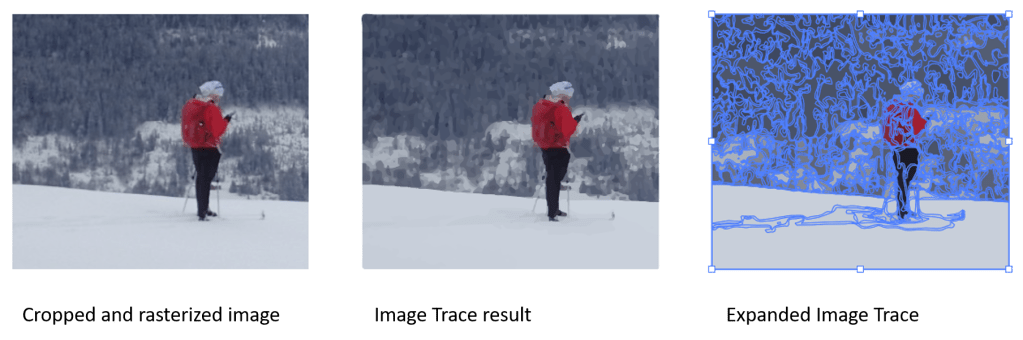
Expanding the result allows us to edit the pieces that make up the image, but prevents further adjustments with Image Trace. I will layer this result on top of the background image. So what I want to do is take away the trees and most of the snow from this result. The expanded result is a group, so I enter the group and start hacking away. Depending on the complexity of the image and the look I want, it can take rather a lot of creativity to wipe away the right pieces. I use the Selection Tool (V) to grab whole objects, the Direct Selection Tool (A) to grab paths or anchors, the Magic Wand (Y) to grab similar colors, and the Delete Anchor Point (-) as my main routes for getting rid of stuff.

I usually make several versions with the background removed. I find it is often easier to start wiping away pieces from the original Image Trace result than to hit “undo” a bunch of times. Plus, I like to compare several results, so having a few partial products to look at helps me find a way forward.
Illustrator instructions
- Place image again
- Crop and rasterize
- Image Trace until satisfied
- Expand tracing result
- Make a few copies of the result, especially it the image is small and doesn’t take up too much memory on your computer
- Remove background with collection of favorite methods
Making layers and export
I wasn’t yet satisfied with the result. So, I made one more layer, this time highlighting my skis and my shadow in the snow. The colors there are so soft that the image trace wasn’t picking them up in the way I wanted. With one more iteration, I now have three layers. I line them up by eye, each in it’s own Layer in Illustrator for fast comparisons. Then it’s just left to drop all the pieces into the Export panel using Alt+drag. Click ‘Export’, follow the menu, and we’re done. Exporting is an experiment in its own right. These days, I’ve been using JPG 100.

Illustrator instructions
- Create the layers you want
- Stack them as desired
- Export
Hire us for your work
Soldrevet and Outspoken Images work together to make art for you. Our specialty is scientific storytelling. We can start from a blank slate and your ideas to build up the imagery you want. Or, we can polish draft work into final form. Have you got a project that you’re not sure fits us? Ask anyway. We can find a solution or help get you in touch with a different designer. We enjoying being part of this community and will help you get the product you want.
